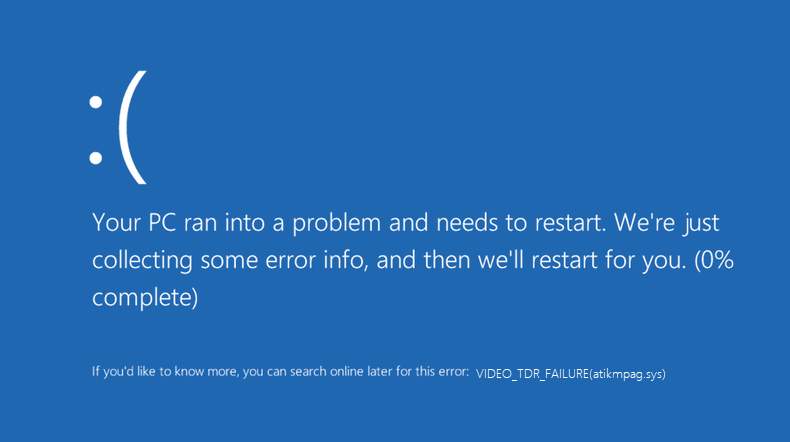
Video TDR failure has been a common issue for Windows 10 users and a majority of them consider it a nightmare.
It is a Blue Screen of Death error that might occur due to an incompatible driver or after a Windows upgrade. Besides, it can also occur due to any defective or faulty hardware.
In this article, we will be focusing on video TDR failure and the fixes for it. We will also mention some causes behind this.
Reasons that are Responsible for Video TDR Failure
Like other Blue Screen error, Video TDR Failure is not very hard to identify. Usually, the cause behind it is certain issues within the video drivers. Let’s take a look into some of the other causes behind video TDR failure on Windows 10.
- Problems with the Graphic Cards
- Outdated Graphic Cards Driver
- Overheated CPU
Once encountered, this issue can make accessing PC a nightmare. For some users, it was also noticed that the PC started showing collecting information and after 100% of its completion, it restarted automatically. Also, this restart can occur repeatedly and as a result, it will trigger a restart loop problem.
Simple and Easy Techniques to Fix Video TDR Failure on Windows 10
Now that you know video TDR failure and the reasons behind it, let’s take a look into some of the easy and effective techniques by which you can resolve it without any difficulty.
FIX 1: Update the Video Driver
A video TDR failure blue screen can appear if the graphics card driver is not updated and thus it might conflict with the Windows OS and can cause this Blue Screen error. Thus, here are the steps you need to follow for a succesful update of Graphic card.
To update the drivers manually, follow the steps mentioned below.
- Go to Start, type devmgmt.msc, and hit the Enter button. Doing this will open the Windows Device Manager.
- In the Device Manager, you will see a list of driver categories for your system. Thus, expand it so that you can see the driver list within it. This means that if you expand “Disk drivers” by clicking on the > icon then it will show all the SSDs, storage drivers, and hard disk.
- Right-click on the “Update driver” option to update any driver.
- After that, choose the way in which you want to install the update. If you select “Search automatically for updated driver software” it will search for the latest updates online, download, and install it automatically for you.
- You can also go to the “Browse my computer for driver software” option and select the relevant file if in case you do not have any internet connection. Now, select Install/ Update option.
FIX 2: Re-install Drivers in Safe Mode
Reinstalling drivers in Safe Mode has helped a large number of users to resolve this issue without any difficulty. Here we have cited the steps in which you can do so.
- First of all, go to Safe Mode in Windows 10.
- Now, Navigate to Device Manager and expand Display Adapters. Now, right-click on AMD/ATI device and then click on Uninstall> OK.
- Restart your system into the normal mode and then install the new version of the Intel chipset driver for the system.
- After doing so, restart or reboot your system and install the newer version of the ATI/AMD device driver on your system again.
FIX 3: Tweaking PCI Express Power Management Settings
Users have claimed that in many instances a low powered CPU, as well as graphic cards, can result in these issues. Thus, if you want to disable power saving for PCI Express but do not want to leave Power settings to high performance, then follow the steps exactly as listed below.
- First of all, go to Control Panel and then “Hardware and Sound”. Next, go to Power Options.
- There, you will have an option by which you will be able to change settings to high performance. Besides, you can tweak PCI express power settings as well.
- Now, tap on Change Plan Settings which should be present near the power plan which is currently being used by you.
- Click on Change advanced power settings. Find and expand PCI Express and then the State Power Management.
- Change the settings to Off for both “On battery” and “Plugged in options”. Press Ok and Reboot your System.
This must resolve the TDR failure BSOD error for you without any difficulty. If not, then follow the solutions mentioned after this.
FIX 4: Rename atikmpag.sys or atikmdag.sys File
If the problem still persists then it is recommended for you to rename the atikmpag.sys or atikmdag.sys file whichever of them is listed within the Blue Screen error. Follow the steps exactly as mentioned, to do so.
- Go to C:\Windows\System32\drivers and look for atikmdag.sys. Now, rename it to atikmdag.sys.old.
- Navigate to the ATI directory (C:\ATI) and look for atikmdag.sy _. However, if you are unable to find it then it is better to search for it in C: drive.
- Now, copy the file to the desktop and press Windows+X. After that, choose Command Prompt (Admin) and type the commands provided below.
chdir C:\Users\[Your Username]\desktop
expand.exe atikmdag.sy_ atikmdag.sy
- If this does not work, use the other command stated below.
expand -r atikmdag.sy_ atikmdag.sys
- You will notice an atikmdag.sys file on your desktop, thus make sure to copy it to the directory C:\Windows\System32\Drivers. Lastly, restart your system to save the changes.
So, here we have mentioned some of the easy and straightforward methods in which you can get rid of “video TDR failure” on Windows 10 quickly. If you have any queries, please let us know in the comments section below. Also, please tell us whether these solutions were helpful for you or not.


