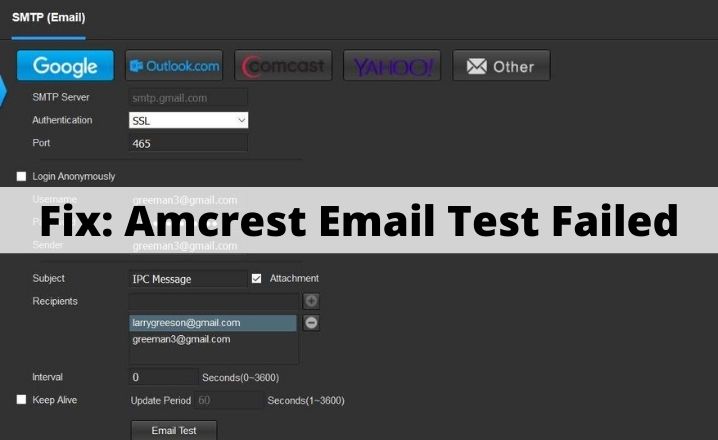
Your Amcrest device can not send the test email, as your email provider does not allow less secure apps. In addition, your outdated Amcrest system firmware will cause the under discussion error.
When trying to set up an email account with the Amcrest device, the affected user gets the error. In certain instances, the user experienced the mistake in trying to test the email features of the user (who doesn’t get the email alerts). This mistake can occur on cameras, DVRs, and NVRs from Amcrest.
Make sure you do not surpass your provider’s daily/monthly email limits before continuing with troubleshooting. Restart your modem and router as well (you must try).
Here are 9 working solutions for you to resolve amcrest email test failed issue within a minute.
How to Fix Amcrest Email Test Failed?
Fix 1: Click the Plus Sign to Activate the Email Address
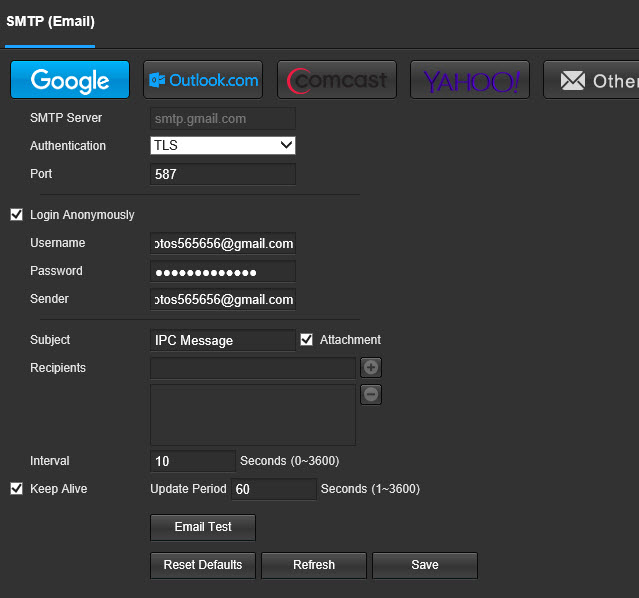
A poor user interface is available for the Amcrest program. Users often assume the email address is entered, but the email address entered is not enabled until the plus sign is not pressed. The same could be the cause of your problem and the problem can be solved by clicking the Plus sign to activate the email address.
- Open and log in the Amcrest Smart Home app.
- Now, tap the Settings icon.
- Then scroll down and tap on Email Alerts option.
- Now, lets select the email provider from the email provider dropdown.
- Now, enter your email address and password (this should be your sender email).
- Then, enter your recipient’s email id and then click on the plus icon.
- Now click the Save button and then tap Email test to check if the problem is solved or not.
Fix 2: Enable DHCP in the Settings of Your Router and Device
Network equipment (e.g. PCs, network printers, mobile devices, etc.) uses the DHCP system to automatically find the IP addresses for the user. DHCP (Dynamic Host Configuration Protocol) is not allowed, you can find the error under discussion (in router or camera settings). We’ll explain the Amcrest cameras process to illustrate this. But, the Amcrest DVR/NVR process is almost same.
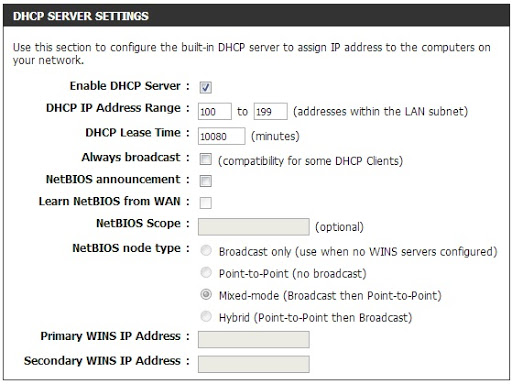
- Enable DHCP option on the router.
- Open the web interface of the device and click on Setup option.
- Then click on Network and then choose TCP/IP.
- Now from the Mode field, enable the DHCP option and then click on the Save button.
- Then perform the email test again to check if the email issue is resolved.
Fix 3: Switch Between Wired and Wireless Network
The new Amcrest devices have a bug that doesn’t allow you to email a wireless link. But with the wired link you can use an email. The bug may be the product of the problem you encounter. With the wired link the email can be checked and then the problem can be solved.
- Disconnect the camera from the Wi-Fi.
- Then connect the camera to the network through an ethernet cable and carry on with the email test.
- If, it comes successful, then connect the camera to the wireless connection and perform the email test to check if the error is there or not.
Fix 4: Change Authentication to TLS
Different protocols (such as SSL and TLS) can provide client-server communications authentication and data encryption. If the authentication protocol is not provided by the client or the server, you can encounter the error under discussion. The supported protocol will solve the problem, i.e. TLS. In this context.

- Open the web interface of the device and proceed to the Setup.
- Then in the left window pannel, click on the Network settings.
- Select your email provider.
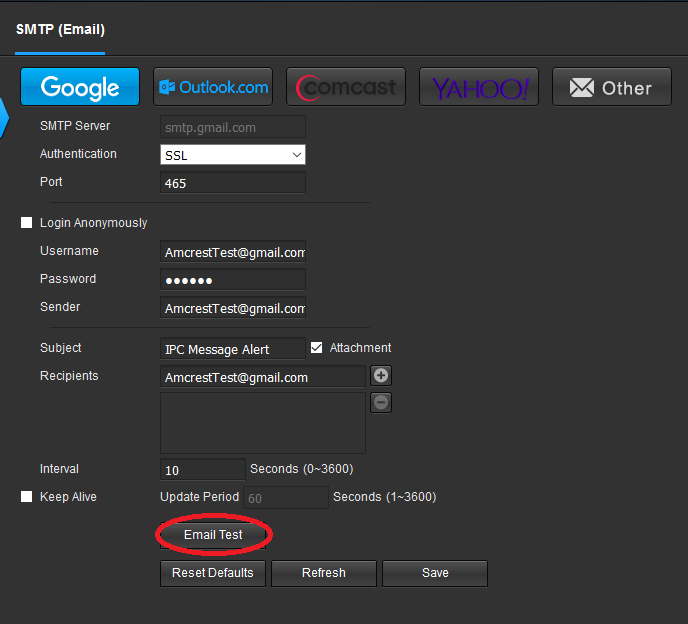
- Change the Authentication to TLS and Port to 587 as per your email provider.
- Now, enter your details like login id and password, recipient address, and subject of the mail, etc.
- Then click on the Save button.
- Now click on the Email Test option to check if the problem still presist.
Fix 5: Free Up Storage of Your Email
Your email address has a storage limit (through your email provider). If the stock limit of your email account has been reached, you can experience the error. In this case, it would be easy to remove such objects to build space or to buy additional storage space.
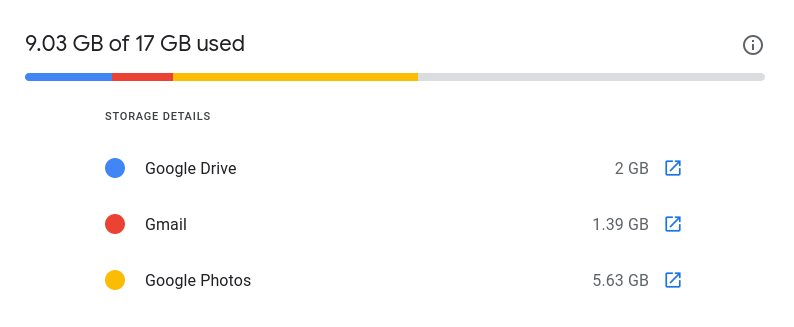
- Open and open your Web browser e.g. Gmail.
- Now delete the emails you don’t need for e.g. if you just send camera shots using this account, delete the folder you sent (if not required). You can also buy the email provider for extra storage. Furthermore, you can set automatic rules for deleting emails on a daily interval with the subject motion.
- After increasing the storage, now check if the email error has gone or not.
Fix 6: Turn off 2-Step Verification and Allow Less Safe Applications
If your email provider does not follow the current security requirements, you can block access to that app or site through your email provider. The root cause of the current problem may also be the same. Access to less safe apps can solve this problem in this context. We will discuss the Gmail method for clarity.
- Launch any browser and sign-in to your Google account using your id and password.
- In the left windows panel, click on the Security option, and then click on 2 Step Verification.
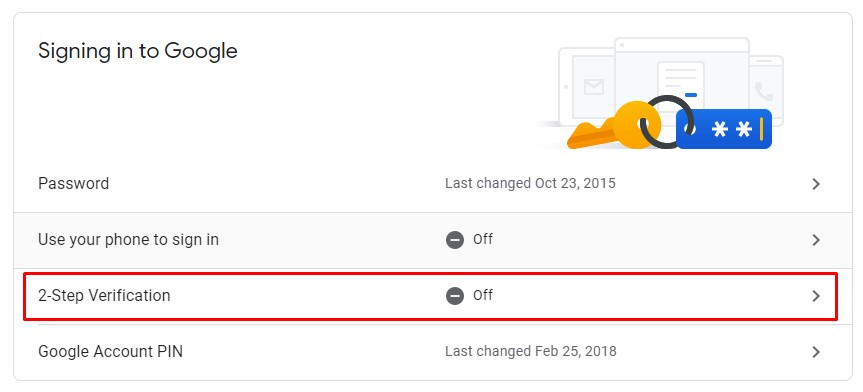
- Now, enter your password.
- Then click on the Turn Off option and check if the problem is solved.
- If not, navigate to the less secure option.
- Enable Allow Less Secure Apps and wait the settings to get saved.
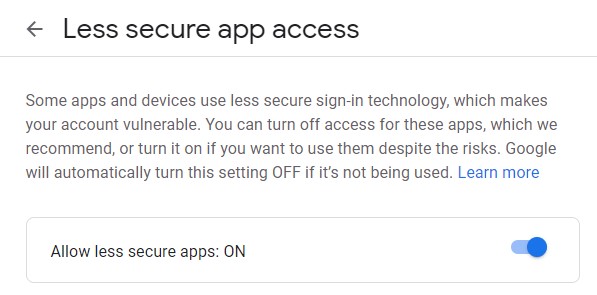
- Now check if Amcrest is able to send the test email.
Fix 7: Upgrade Firmware of Your Amcrest Device
In order to address new technology advancements (especially changes by e-mail providers such as Google) and to patch known bugs, Amcrest updates its devices’ firmware. If your device’s firmware is obsolete, you can experience the error being discussed. Updating your device’s firmware will fix the problem in this scenario.
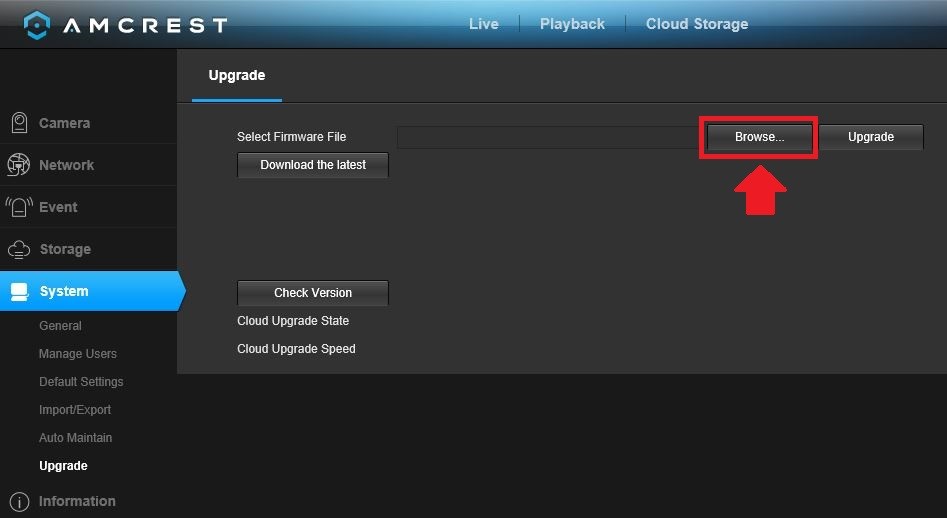
- Open the any browser of your system and download the latest firmware for your device.
- Then access the web interface of your camera and then click on the Setup.
- Now click on System settings and then click Upgrade option.
- Then click on the Browse button and then select the downloaded firmware (at step 1).
- Now wait for the loading of the firmware in the web interface and then click on the Upgrade button. Before that you can backup your configurations by using Import/Export optinon under the system.
- Now wait for the upgrade to complete. The device will automatically restart after the upgrade.
- After the restart, open the interface again and click Setup.
- Now click on System settings and thenchoose Default Settings option.
- Now click Restore to the Default Settings.
- Then wait till the camera gets rebooted.
- After the reboot, set up an email on your camera (Network->SMTP (Email)->Email Test) and check if the error still presist. If you want to restore your old configurations, use Import/Export under the system settings (you will have to wait for 30 minutes before the old configuration is restored).
Fix 8: Try Another Email Service
E-mail providers can adjust various settings to improve safety and efficiency. If the email provider is not supported with Amcrest, you can experience the error under debate, as Gmail is well established to have problems with Amcrest devices. In this situation, it is possible to solve the problem with another email service such as Outlook. You have problems with Gmail, for example, and then attempt Outlook. For example, if you are having problems with Gmail and you must use Gmail, then set Outlook on the system and send the camera mail to Gmail, and you must send it to the primary email address, set up another mail service to send emails to the primary account.
- Open the interface of your device and click on Setup option.
- Then, in the left windows panel, click on Network settings.
- Click on Outlook and then fill the details like id and password, recipient address, and subject, etc
- Now click on the Save button.
- Then click Email Test button and check if is there or not.
- If not, then change the settings as per your email configuration of Outlook (as discussed previously in the solution 4)
- To receive notifications you will have to confirm the verification email.
- You can also use Zoho email provider but you may have to disable the option “save a copy of the email in sent folder” in the SMTP setting in Zoho to work.
Fix 9: Use Your Manual SMTP Server
If above tricks didn’t worked for you, then you may have to set up a free mail server on your PC and let Amcrest application send the mails to that mail server. We will discuss here about the process for Hmailserver.
- Download and install the latest hmailserver application on your system.
- Now, set up a new domain using the IP scheme of your system and create a new user under that domain. Now to set up a new forwarding email, add your Gmail/Outlook/Yahoo address under the Delivery of Email tab under Settings>>Protocols>>SMTP.
- Then, open the interface of device and click Setup.
- Now, in the left windows panel, click on Network and then click on Other.
- Fill in the details as per the setting of the SMTP server. Make sure to set up the Authentication option to None and Port no to 25. Also, append the local IP address (the host PC) to the username of hmailserver and hopefully, the email issue will be resolved.
We hope that this article will help you set up your Amcrest HDPro or HDSeries camera by using your email. It has taken several tests and mistakes to solve it. You can save time by following the instructions below.

