Most of the time, when you are trying to download an essential update on your Windows 10 device, error code 0x8000ffff might pop up on the display.
The prime reason behind this error is corrupted drivers or malware infection.
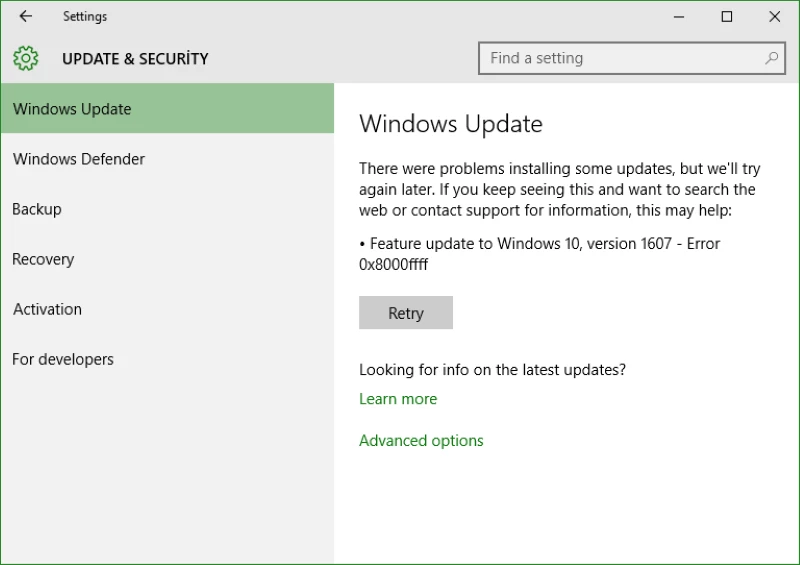
Moreover, when you try to update Windows 10, then it will be stuck and an error message saying ‘ Feature update to Windows 10, version 1607 -Error 0x8000ffff appears on the display.
Hence, it is essential to remove this error instantly with an appropriate fix.
How to Fix Error 0x8000ffff?
Apply the below solutions one after another until the error is resolved.
Solution 1- Scan your Computer
The first thing that you have to perform is a full scan. For that, you are advised to use the inbuilt Windows Defender software.
Now, to run this component, first, open the Windows Defender from the Notification area. Then, navigate to the Settings section.
Within Settings, scroll down and select Windows Defender Offline.
Furthermore, choose the Scan Offline button. Wait for a while as the scanning process might take more than 20 minutes.
Once done, then reboot your Windows 10 device and check if the error still persists or not.
Solution 2- Clear the Microsoft Store Cache
Another easy way to fix the 0x8000ffff Windows 10 update error is by clearing the Microsoft store cache.
For that, press the Windows and R keys simultaneously to open the Run dialog box. Then, enter ‘wsreset.exc’ in the available field and press the Enter key.
Now, a black Command Prompt window might appear on the display for 15 seconds. Then, the store will open by itself.
However, if this does not work, then again open the Run box and this time enter the following command.
‘C:\Users\%USERNAME%\AppData\Local\Packages\Microsoft.WindowsStore_8wekyb3d8bbwe\LocalState’
In case, there is already a cache folder, then rename it cache.old. In addition, you are advised to create a new folder called Cache.
Furthermore, run the troubleshooter and this will detect and resolve the flaw.
Again restart your machine and if you are unable to eliminate the error.
Solution 3- Set the Correct Date and Time
It might look insignificant, but incorrectly setting a date and time can lead to several issues. And error code 0x8000ffff can be one of them.
So, ensure that you have set the correct date and time. In order to do so, go through the undermentioned steps.
Step 1
First, navigate to the Home Screen and right-click on the bottom right corner. Then, select Adjust Date/ Time from the menu.
Step 2
After that, search for the Set time automatically option. Then, you have to disable it. Wait for a while and again turn it on.
Once done, the date and time will be updated. Alternatively, you can manually adjust the date and time.
Then, again reboot your system to check if any change has been made or not.
Solution 4- Remove the Software Distribution Folder
Deleting the Software Distribution folder can eliminate the error effectively. To delete the folder at first, click on the Start menu and type ‘command prompt’ in the Search field.
Once the Command Prompt window opens, then right-click on it and choose Run as Administrator option.
After that, an elevated Command Prompt window will appear on the display. Here, enter the below command and hit the Enter key after every command.
- Net stop wuauserv
- Net stop bits
After that, open a Windows Explorer window and that copy and paste the following command in the address bar.
C:\Windows\SoftwareDistribution
It will then open the Software Distribution folder. Afterward, press the Ctrl and A keys simultaneously to select all the files. In addition, tap on the Delete button.
In case you are unable to delete some files, then reboot your computer and repeat the process again. Once all the files have been removed, then reboot your Windows 10 device.
Solution 5- Repair the Network Problem
According to some users if there is a network issue, then due to this you might come across the error code on the system.
In such a condition, you can use the Windows 10 integrated network repair troubleshooter to remove the error. To run this troubleshooter, carefully follow the given steps.
Step 1
At first, press the Windows and I keys simultaneously. After that, type ‘troubleshoot network’ in the search field.
Step 2
After that, a new window will pop up on the display. Here, drop down and choose the Network Troubleshooter. After that, follow the online instructions.
However, if this solution does not work, then try to change the DNS settings. As switching to an alternative DNS can sometimes be an effective fix for the network-related issue. So, perform the following:
- Enter ‘network’ in the search field and choose the best match.
- Thereafter, choose Network Adapter option from the list of options.
- Furthermore, right-click on the active connection and choose Properties. In addition, navigate to the Internet protocol version 6 and again select the Properties option.
- Next, check the dialog box beside the use of the following DNS address server. Then, enter 1111 and 8888 and press the Enter key.
Well, 1.1.1.1 is basically a privacy-focused DNS while 8.8.8.8 is the Google Public DNS.
Solution 6- Boot Into the Safe Mode
If none of the above solutions works for you, then we suggest you to boot your device into the Safe mode. To do so, move to the Start menu and open the Settings app.
Afterward, choose the Update & Security option. Furthermore, navigate to the Recovery tab and click on the Restart option under the advanced tab.
Once your computer restarts, then select the Troubleshoot option. Therefore, again navigate to the Advanced option and select the Startup Settings.
In addition, click on the Restart button. Once done, after that, select the Safe mode with the Networking option.
Then, try to update the system/ application.
Solution 7- Create a New User Account
Occasionally, this error can also occur due to the user account. In case, the user is corrupted or if you don’t have administrative privileges, then you are not able to update the Windows.
However, you can simply fix the error by simply creating a new user account. For that, follow the given steps.
Step 1
First, you should press the Windows and I keys together to open the Settings app. From there, move to the Account section.
Step 2
Then, go to the left panel of the window and choose Family & Other people. After that, click on the Add someone else to this Pc option.
Step 3
On the next page, select the I don’t have this person’s sign-in information button.
Now, your system will ask you to create a new Microsoft account. Next, choose Add a user without a Microsoft account button.
Step 4
Enter the username and tap on the Next option. In case you want to put a password, then we advise you to enter an easy one so that it can be easily membered.
Step 5
Furthermore, you just have to convert the new account to the administrator account. For that, move to the Setting app and then go to Accounts.
In addition, choose the Family and other people. Next, choose the Account type to administrator and tap on Ok.
Hopefully, with the help of the above solutions, you can fix the error 0x8000ffff on your own.
