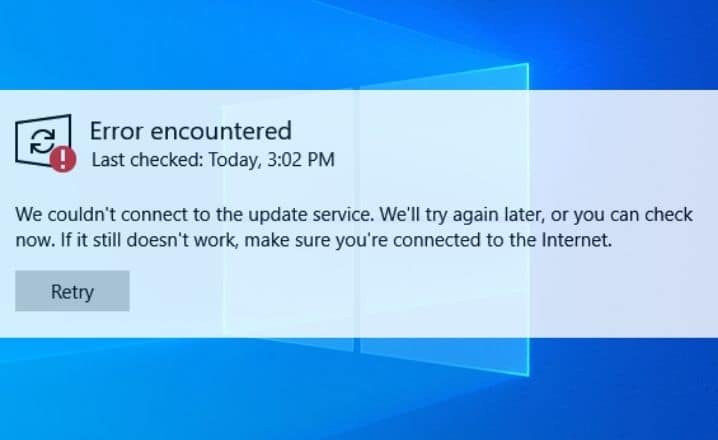
In the process of checking and installing updates on Windows you may at times come across the error, We couldn’t connect to the update service. The complete message reads as “We couldn’t connect to the update service. We’ll try again later, or you can check now. If it still doesn’t work, make sure you are connected to the Internet.”
Users have reported that even if they had a working internet connection, they faced this issue. However, the web browsers display web pages and only at the time of examining Windows updates, this error appears.
Several factors may result in this message we couldn’t connect to the update service on Windows 10. But the common ones are Corrupt system files, the Windows update service getting stuck and not running, or conflict with any third-party apps, etc.
How to fix “We Couldn’t Connect to the Update Service”
To solve the aforesaid error please go through the solutions below. Try them one by one in the order provided and you should be able to resolve this error quickly.
Fix 1: Check your Internet Connection
Your first and foremost task should be verifying your internet connection if everything is running properly. In case you are making use of a WiFi connection, it would be wise to reboot your router first.
In addition, reboot your Windows 10 system without any peripherals currently connected.
Do repeat the updating process and this shall be visible under the Windows Update. Tap Win+I keys and tap on Update and Security. Thereafter, tap on Windows Update from the main window’s left panel and check whether there are any updates for your computer. Finally, follow the on-screen prompts for finishing the update process.
Fix 2: Change your DNS Address
DNS makes it easy for you in launching websites and accessing internet services. The DNS instructs your PC for accessing a service, and issues with the DNS can cause services like Windows Update to be unavailable temporarily.
But you can solve this We couldn’t connect to the update service error by modifying the DNS settings on your computer. To do this, do the following:
- At first, tap Windows +R keys and input ncpa.cpl and click OK.
- Doing this will open the window of the network connections.
- Next, right-click on the in-use network interface. For example: right-click on the ethernet adapter which is connected and displayed on the screen.
- After that, double-click on Internet Protocol Version 4 for opening its Properties window.
- Use the DNS server addresses as follows:
- Preferred DNS server 8.8.8.8
- Alternate DNS server 8.8.4.4
- Next, tap on validate settings on exit and OK.
- Lastly, examine if there exists any Update Service error.
Fix 3: Run Windows Update Troubleshooter
Another possible solution is running your Windows Update Troubleshooter. For this, do as directed:
- To begin with, launch Windows Settings.
- Then tap on Update and Security and thereafter Troubleshoot.
- You will see here various troubleshooting options for fixing different issues.
- Next, search for Windows Update Troubleshooter.
- Lastly, tap on it and execute the Run the troubleshooter button.
This approach will help identify if there exists any problem which obstructs your PC from downloading and installing Windows Updates. After completing the process, reboot Windows and manually Check for Updates again.
Fix 4: Ensure you have Sufficient Disk Space
At times, if the free-space remaining on your hard drive is less than required, you cannot apply the update and hence, you see the error we couldn’t connect to the update service. Therefore, ensure that there are at least 10GB free space left and thereafter try updating your Windows system again.
Fix 5: Execute a System Scan
Together with the Windows Update Troubleshooter, you need to execute another general scan. Through this scan, you can repair corrupted system files and other malfunctions and common errors which might block your Windows 10 update. To do this follow the steps below:
- At first, right-click on the Windows Start icon.
- Then, from the displayed list, tap on the Command Prompt entry.
- Thus, this will lead to the opening of the Command Prompt window.
- Next, type sfc/scannow and hit Enter.
- The scanning will start and the procedure will take some time to complete depending on the number of files stored on your system.
- If there are any problems, the troubleshooter will fix them on its own.
- Finally, reboot your PC and try updating again.
Fix 6: Examine your Disk for Corrupted Sectors
Defragmentation operation on the C drive can be another way out for fixing the error we couldn’t connect to the update service. For this, do the following:
- Firstly, on your PC, open an elevated command prompt.
- Next, input chkdsk c:/r and hit Enter.
- Wait till this process is executing and in the end reboot your PC.
- Finally, try again the Windows 10 update procedure as your device should run without any problems now.
Fix 7: Remove Antivirus Protection
In case you are using any third-party protection solutions, try disabling that temporarily. Your Windows Update might get blocked due to any antivirus software.
Disabling these programs and retrying the update process might help.
Fix 8: Try Manual Update
If the above methods did not solve your problem try installing the Windows Update manually.
For this, search the version number of your update and thereafter access the official Microsoft website. You can tap Win+I and choose Update & Security and move to Windows Update. Next, tap on Advanced Settings & choose Update History.
Finally, search for your specific Windows 10 update and download & install it on your PC by following the on-screen prompts.
In addition, you can try navigating to Microsoft Update Catalog and download the particular update from there. You can install it like other existing executable apps.


