One of the benefits of having an Apple iPhone is that we can take incredible photos effortlessly. Of course, our aim is not just to take photos, but to keep them, because they record some important moments. You certainly don’t want to lose all your memories, so it is necessary to spend a few minutes knowing how to back up photos on your iPhone.
Why need to backup photos on iPhone
- On the one hand, there is a risk of losing the photos stored on the phone. Accidental deletion, software errors, iOS updates, etc. can all lead to data loss. If the photos are backed up, then you don’t have to worry when something goes wrong with your iPhone because the photos are safe.
- On the other hand, the storage space of the iPhone is limited, sometimes you have to delete some photos to free up space so you can save the newly taken photos or other data. Before the deletion, we need to back up these photos to another place so you will not lose them forever.
While backing up photos on your iPhone may not sound like an easy job, it’s definitely not a useless task. It is a crucial step to ensure that your photos are never lost. In addition, backing up your photos isn’t as hard as you might think. With the right tool, photo backup can be easily achieved.
The tool you will need to backup photos on iPhone
An iPhone user can back up the iPhone with iCloud or iTunes. However, when it comes to backing up photos, both tools have their disadvantages.
- You can turn on iCloud Photos to upload all photos to a cloud server. However, there are only 5 GB of free storage space to store the data. If you need to back up a large number of photos, iCloud is not a good choice.
- You can connect your iPhone to your computer and backup your iPhone photos with iTunes. However, iTunes will back up the entire iPhone and not allow you to back up only photos. In addition, the backup files are not readable, which means you cannot view your photos on the computer.
In short, neither iCloud nor iTunes offers a convenient way to help you back up your photos. If you want to backup iPhone photos the way you like, you can choose to use third-party backup tools, such as FoneTool.
FoneTool is one professional iPhone data backup tool for Windows users. It can help users back up iPhone to computer, external hard drive, USB card drive. Below are its outstanding features in photo backup.
- Two backup modes. MBackupper lets you create image backup files of photos or transfer photos in original format.
- Backup photos you need. MBackupper will show you all your albums so you can easily find the photos you need to back up.
- No-data-loss restoration. Mbackupper allows you to restore selected photos to your iPhone and it will not erase any existing photos.
- Widely Compatible. MBackupper supports iOS 15/14, iPhone 13/12 Pro/12/11/XS, and other previous iOS and iOS devices.
How to backup photos on iPhone
There are two ways to backup iPhone photos to a computer. You can choose to create an image backup of your photos or transfer original photos to a computer as a backup.
Way 1. How to backup iPhone photos to a computer
The Photos Backup feature can help you create an image backup file for your photos.
Step 1. Launch AOMEI MBackupper > Connect iPhone to computer via USB cable. You may need to enter the passcode on your iPhone so the tool can access your device.
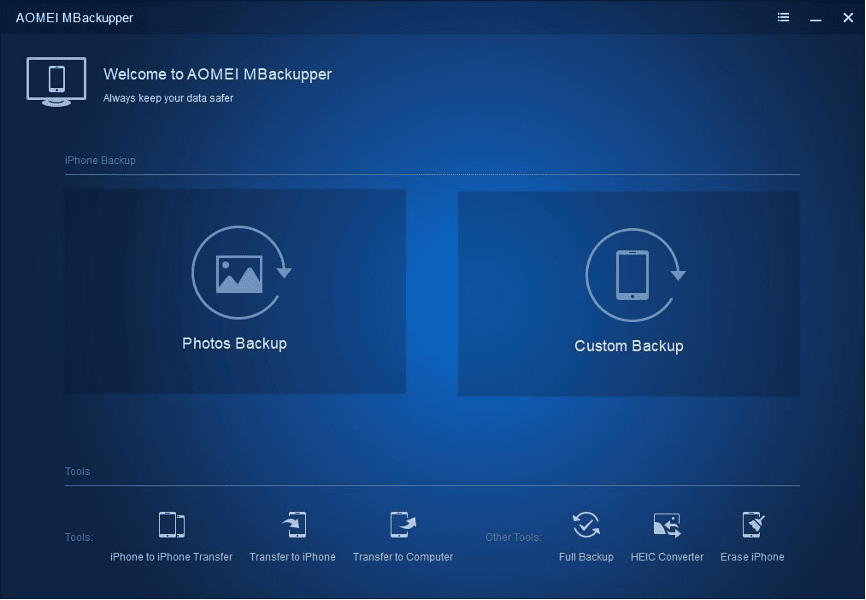
Step 2. On the home interface: Choose Photos Backup.
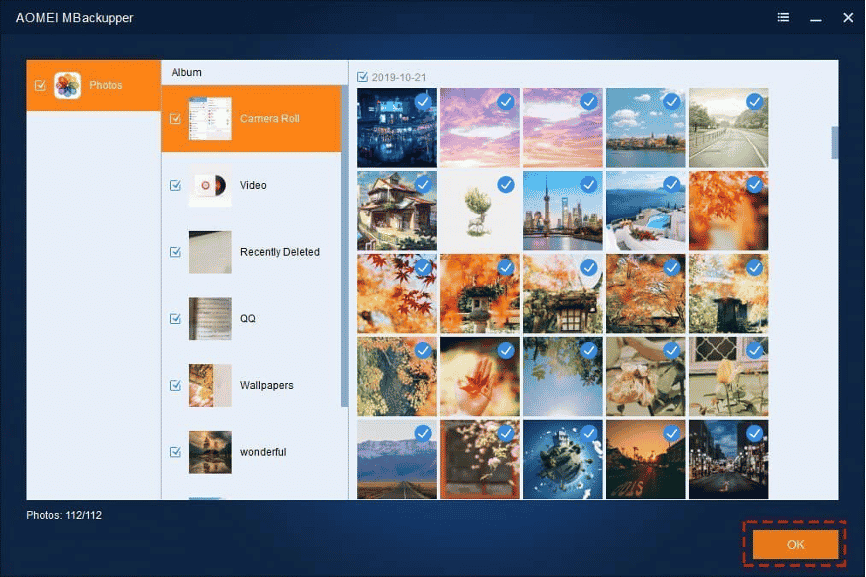
Step 3. Click the Photos icon > Select the photos you want to backup > Click OK to confirm.
Step 4. Select a storage path > Click Start Backup to make it.
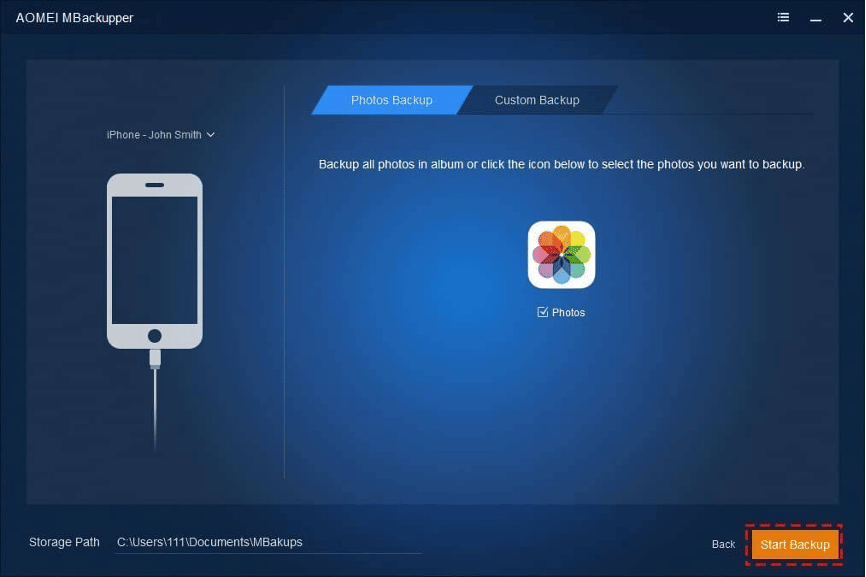
When the backup is complete, you can go to the Backup Management page to check the backup task, from there you can view the backup files or run an incremental backup to backup newly taken photos.
Way 2. How to transfer photos from iPhone to computer as a backup
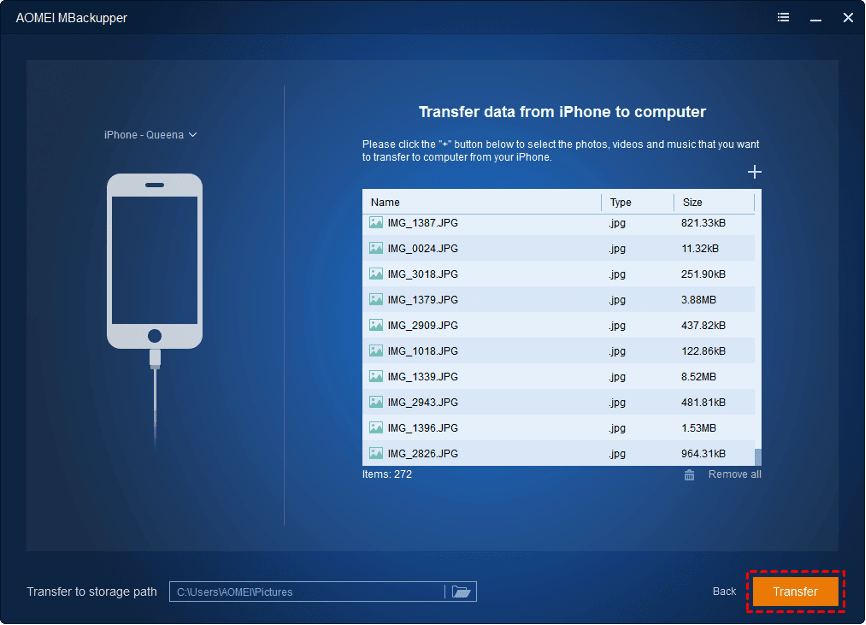
The Transfer to Computer features allows you to transfer photos from iPhone to computer as a backup.
Step 1. Run MBackupper > Plug in your iPhone.
Step 2. On the home interface, choose the Transfer to Computer option.
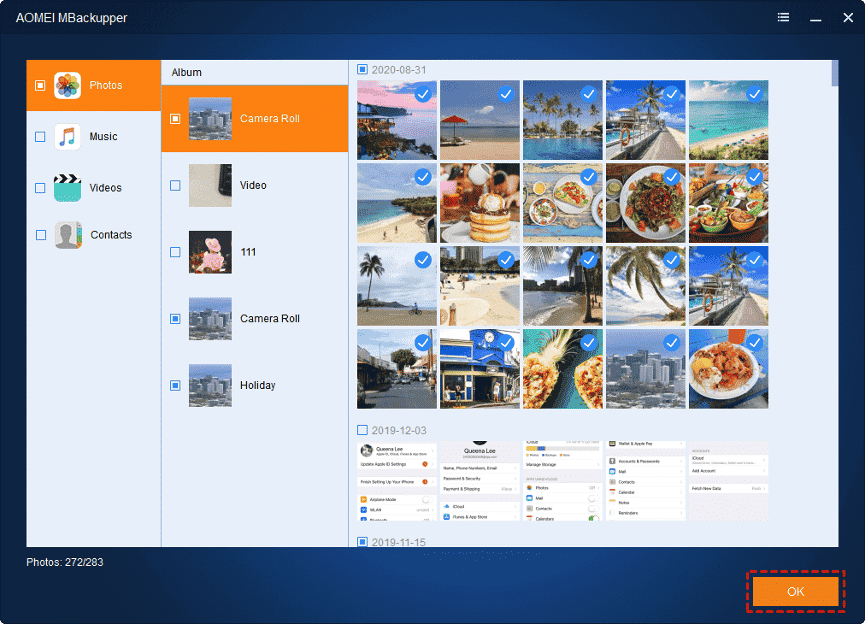
Step 3. Click the Plus icon > Choose the photos you want to transfer > Click OK to continue.
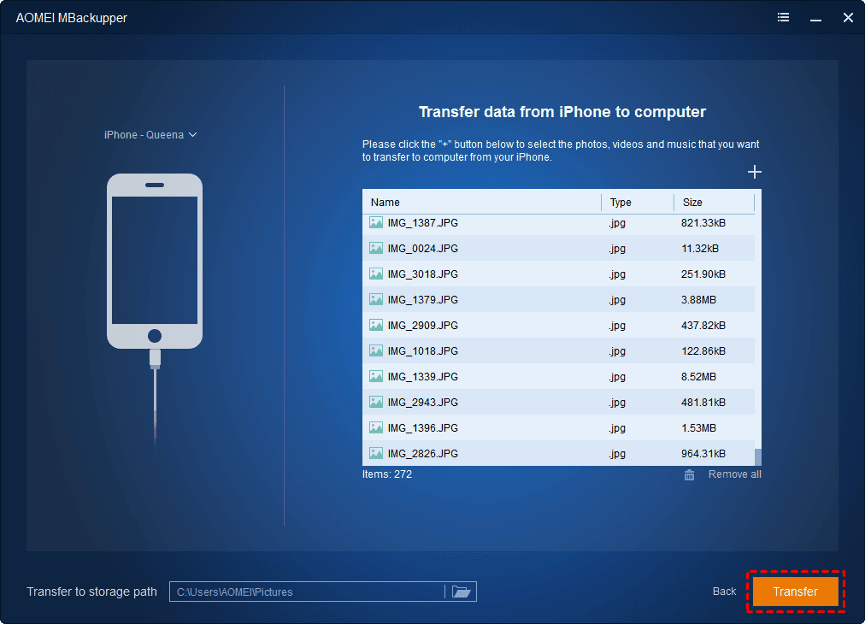
Step 4. Select a path to save the photos > Finally, click Transfer.
